2026-08-03 0
处理Linux环境下配置openclaw并连接到局域网ollama模型这类问题时,先确认目标场景,再按步骤核对配置或玩法细节。
ollama:
openclaw:
在本地局域网内的机器上已经部署了ollama
ollama模型已下载,服务已经开启,可以通过curl http://local.ollama.host:11434/v1/model 获取到模型信息就行了
本文中机器A是centos8 yum源已换、已经安装node22+,npm换源淘宝源
# Recommended: global install (npm/pnpm) npm install -g openclaw@latest # or: pnpm add -g openclaw@latest # Onboard + install the service (launchd/systemd user service) openclaw onboard --install-daemon
workspace: ~/clawd 当然你也可以修改
channel可以先跳过,后面可以安装飞书插件
provider也先跳过,后面改配置加本地ollama
model随便选一个
skill跳过
Gateway相关默认
安装后选webUI 会出来ssh连接链接和浏览器访问链接
nano ~/.openclaw/openclaw.json
然后主要是models和agent要改
"models": { "providers": { "ollama": { "baseUrl": "http://local.ollama.host:11434/v1", "apiKey": "ollama-local", "api": "openai-completions", "models": [ { "id": "qwen3:30b", "name": "Qwen3 30B", "reasoning": true, "input": [ "text" ], "cost": { "input": 0, "output": 0, "cacheRead": 0, "cacheWrite": 0 }, "contextWindow": 32768, "maxTokens": 327680 }, { "id": "qwen3-coder:30b", "name": "Qwen3 Coder 30B", "reasoning": false, "input": [ "text" ], "cost": { "input": 0, "output": 0, "cacheRead": 0, "cacheWrite": 0 }, "contextWindow": 32768, "maxTokens": 327680 }, { "id": "qwen2.5:14b", "name": "Qwen2.5 14B", "reasoning": false, "input": [ "text" ], "cost": { "input": 0, "output": 0, "cacheRead": 0, "cacheWrite": 0 }, "contextWindow": 32768, "maxTokens": 327680 } ] } } }, "agents": { "defaults": { "model": { "primary": "ollama/qwen3-coder:30b", "fallbacks": [ "ollama/qwen2.5:14b" ] }, "models": { "ollama/qwen3:30b": {}, "ollama/qwen3-coder:30b": {}, "ollama/qwen2.5:14b": {} }, "workspace": "/root/clawd", "compaction": { "mode": "safeguard" }, "thinkingDefault": "off", "maxConcurrent": 4, "subagents": { "maxConcurrent": 8 } } },现在就已经可以通过本地模型进行对话了
clawdbot plugins install @m1heng-clawd/feishu
访问飞书开放平台:https://open.feishu.cn/app
使用您的飞书账号登录。
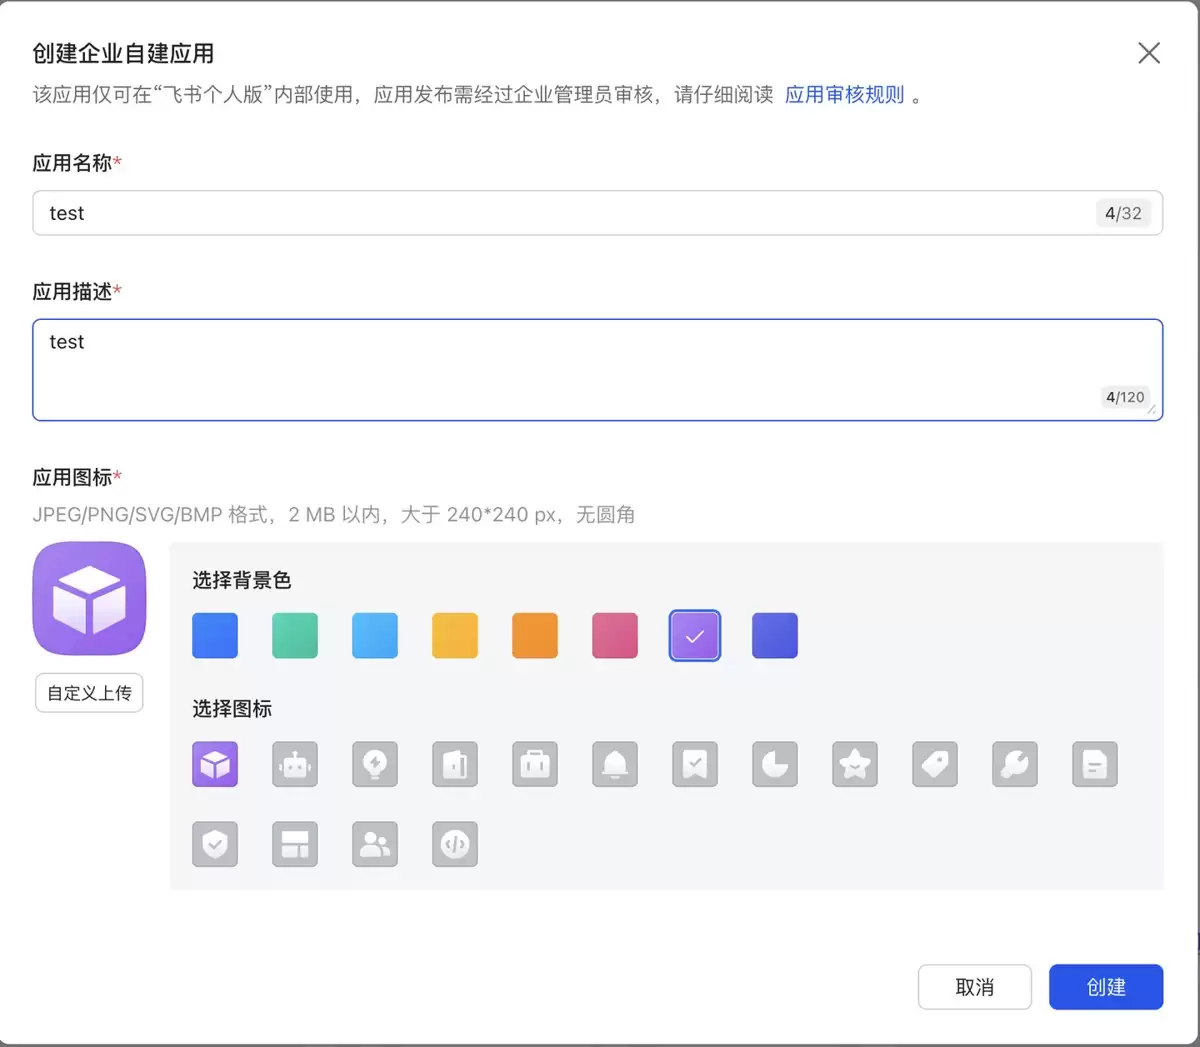
创建应用后,进入应用详情页面:
获取应用凭证
重要提示:App Secret 是敏感信息,请妥善保管,不要泄露给他人。
使用 clawdbot config set 命令配置飞书参数:
# 配置 App ID(替换为您的实际 App ID)clawdbot config set channels.feishu.appId "cli_xxxxxxxxxxxxxxxx"# 配置 App Secret(替换为您的实际 App Secret)clawdbot config set channels.feishu.appSecret "xxxxxxxxxxxxxxxxxxxxxxxxxxxxxxxx"# 启用飞书通道clawdbot config set channels.feishu.enabled true
在飞书开放平台为应用添加机器人能力:
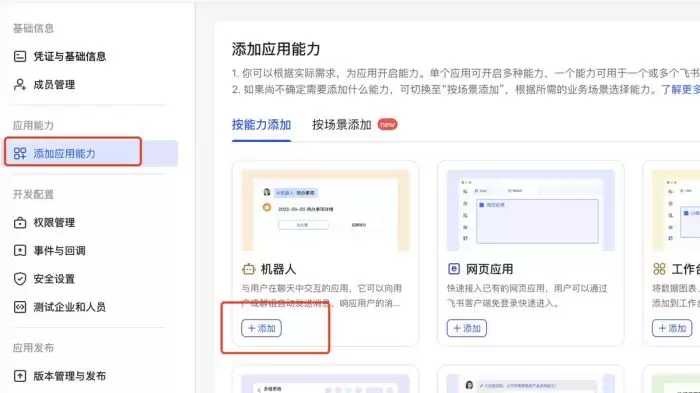
添加机器人能力
im.message.receive_v1 - 接收消息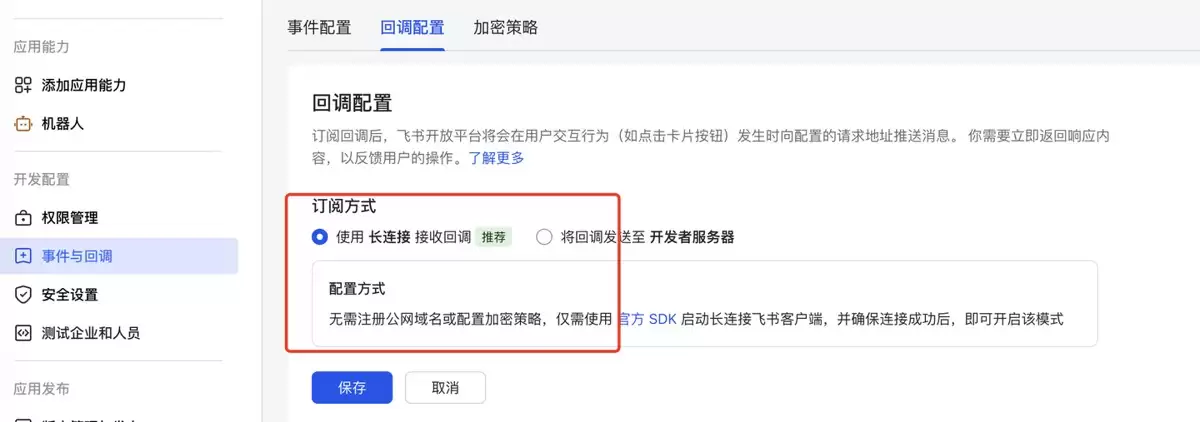
具体请参考作者项目说明文档
必需权限:
| 权限 | 范围 | 说明 |
|---|---|---|
im:message | 消息 | 发送和接收消息 |
im:message.p2p_msg:readonly | 私聊 | 读取发给机器人的私聊消息 |
im:message.group_at_msg:readonly | 群聊 | 接收群内 @机器人 的消息 |
im:message:send_as_bot | 发送 | 以机器人身份发送消息 |
im:resource | 媒体 | 上传和下载图片/文件 |
在权限列表中搜索权限并配置
完成权限和事件订阅配置后,必须创建版本并发布应用,否则配置不会生效!
配置完成后,需要重启 ClawdBot 服务使配置生效:
clawdbot gateway restart
你可以通过飞书向机器人发个消息,然后他会回复
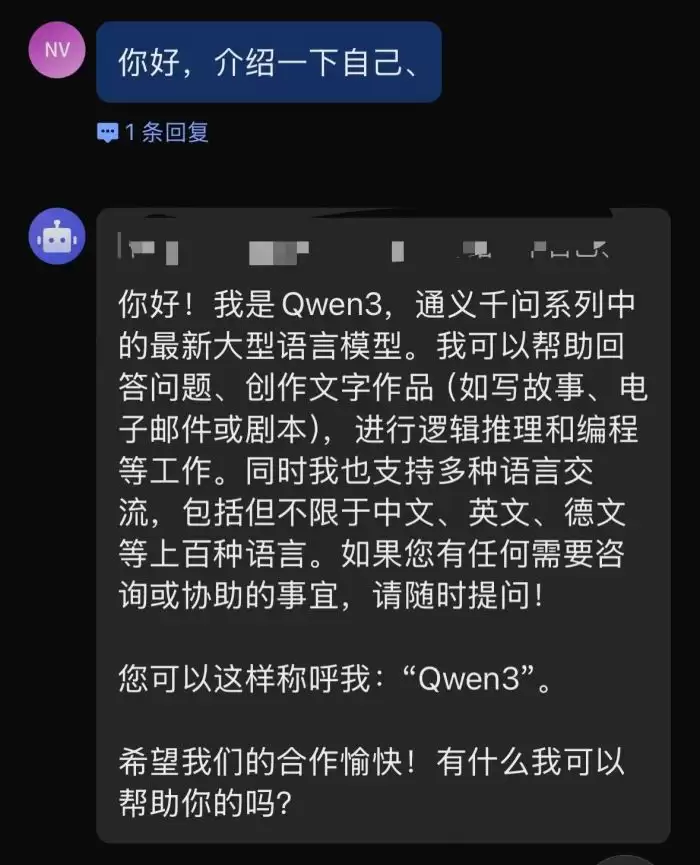
也可以用命令主动发一个消息
openclaw message send --channel feishu --target "chat:oc_XXXXXXX(飞书的chatid)" --message "这是一条测试"
也可以配置cron任务
openclaw cron add --name "AI Server Monitor" --cron "cron时间配置" --session isolated --message "定时要执行的任务" --model "qwen3-coder:30b" --deliver --channel feishu --to "chat:oc_XXXXXXXXXXX"
可以通过clawhub去安装skill扩展能力,具体查看openclaw的doc。
大家都在看

Copyright(C) 2020-2026 jiyx.com All Rights Reserved 联系方式:[email protected]